ImageMagick is a neat little command line library for image editing. I use it a lot for bulk image edits like resizing or cropping a bunch of photos in a folder. You could also use it to watermark, composite, or alter images in some other way you might do in Photoshop.
Check out the official documentation for a full list of what it can do.
Understanding the two main commands
ImageMagick has two main commands:
convertmogrify
convert takes an input image and outputs an additional image based on whatever transformations you pass to it. Here’s an example that takes an input PNG image, resizes it to 50%, and then exports it as a jpg:
convert my-original-image.png -resize 50% my-new-smaller-image.jpgmogrify takes an input command, looks for any images in the directory that match that command, and replaces any matching images. Here’s an example that looks for any PNG files that start with the text step- and then resizes any matches to 10% of their original size:
mogrify -resize 10% step-*.jpgUnderstanding the wildcard selector
You may have noticed the * in the above command. That tells ImageMagick that any character from that point forward is a match. E.g. step-1.jpg, step-2.jpg, step-wet-paint.jpg, etc.
The * wildcard selector a common programming convention. You’ll often see it in CSS, for example.
Here’s a more basic example of the wildcard selector that accepts any JPG in the current directory:
mogrify -resize 10% *.jpgAdd a colour border to a selection of images
This is simple as long as you’re good with fixed border sizing and simple colours. Here’s an example that adds a 100px border to all sides of each JPG file in the current directory:
mogrify -bordercolor white -border 100x100 *.jpgAnd here’s what that looks like:
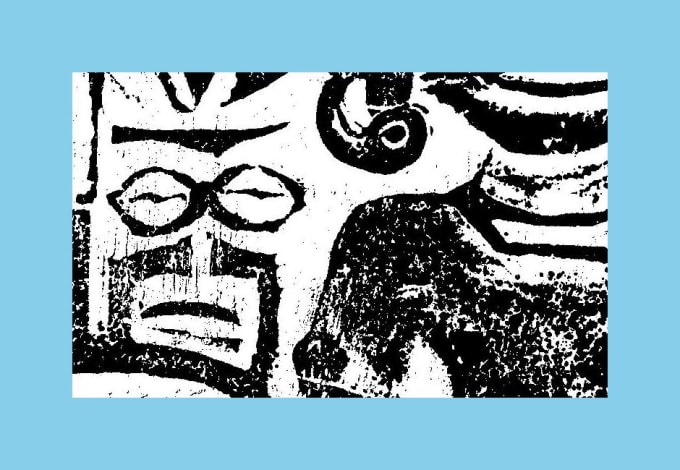
See this legacy documentation page for more information. Proportional borders or custom fills require some more maths.
Resize, flip, or rotate a selection of images
You don’t need ImageMagick for these transformations on macOS as there is the built-in sips command. If you still want to use ImageMagick for these transformations, here’s how:
Resize a selection of images
Use either the -resize or -r commands.
Resize by percentage:
mogrify -resize 10% step-*.jpgResize by pixel dimensions but keep original aspect ratio if it doesn’t match:
mogrify -resize 800x600 step-*.jpgResize by pixel dimensions and enforce the exact dimensions:
mogrify -resize 800x600! step-*.jpgResize by just the width pixel dimension, with height calculated automatically:
mogrify -resize 800 step-*.jpgResize by just the height pixel dimension, with width calculated automatically:
mogrify -resize x600 step-*.jpgBrighten a selection of images
Pass in -brightness-contrast and a value between -100 and 100. Example:
mogrify -brightness-contrast 20 step-*.jpgMake a spritesheet from a selection of images
Use -append for a vertical spritesheet and +append for a horizontal one.
convert step-*.jpg -append spritesheet.jpgNote that ImageMagick will order images by the first digit it encounters. In other words, if I name my individual files step-1.jpg, step-2.jpg, step-3.jpg, …, step-10.jpg, step-11.jpg, step-12.jpg, ImageMagick will order them like so:
- step-1.jpg
- step-10.jpg
- step-11.jpg
- step-12.jpg
- step-2.jpg
- step-3.jpg
- …
Prevent this by ‘padding’ each file with as many digits as you go up to. Since I’m going up to -12 in this case, which is two digits, I’d pad the names like this: step-01.jpg, step-02.jpg, and so on.
You can apparently also use the montage command (which lets you place images on a grid), although it looks problematic.
Get rid of EXIF data
EXIF data is information about an image, attached to that image. It’s how you see where in the world a photo was taken, on what camera, and so on. Use -strip to remove it. Here’s how:
convert original-image.jpg -strip private-image.jpg-strip will also remove all these profiles, comments, and chunks: bKGD,cHRM,EXIF,gAMA,iCCP,iTXt,sRGB,tEXt,zCCP,zTXt,date.
Change the format of a selection of images
Here’s how to change all TIFF files in the current directory to JPG:
mogrify -format jpg *.tiff